Module Overview · Same Code, Bigger Floor
Same Code, Bigger Floor
Teacher mode is on — the gray boxes are yours only. Flip the switch (bottom-right) to preview the student view.
Module 2 ended with a robot that can follow a line, find a cross, park on it and turn onto the next line. That was all on one taped circle. In this module the floor becomes a grid: taped lines running across and up, crossing each other all over.
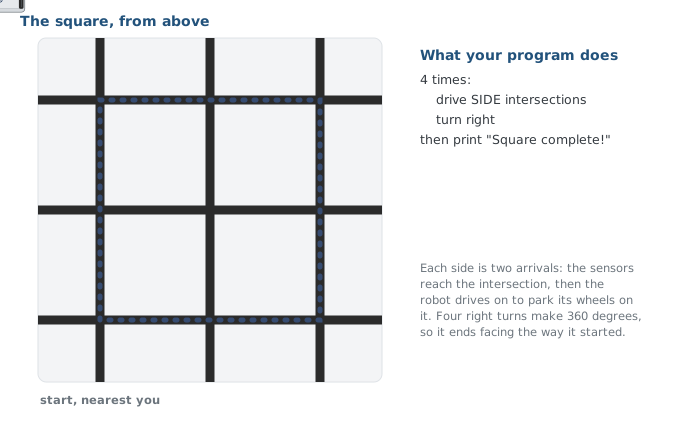
By the end of the module your robot will drive a square around the grid, two intersections per side with a right turn at every corner, and finish exactly where it started. It's a short module, four lessons, because you already wrote the hard part.
Learning Objectives
By the end of this overview you will be able to:
- Describe what the robot will do by the end of Module 3
- Explain why the module needs so little new driving code
- Describe a route on the grid as drives and turns, counted in intersections
- Say who plans the route in this module, and who will plan it in Module 4
Reuse is the whole idea
You'd expect a new kind of floor to need a new program. It doesn't. The two sections
of robot.py you finished in Module 2, LINE SENSOR and LINE TRACKING, already know how
to follow a line, stop at a cross and turn onto the next line, and a grid is made of
nothing else. They come across into this module unchanged.
What's new is a third section, GRID DRIVING, and it's small: a way to say "drive through three intersections" in one line, and tests that string drives and turns into routes. None of it reads a sensor. It only calls the functions you already trust.
That's how real programs get built: write a piece well once, test it, then use it for things you hadn't thought of when you wrote it.
Routes in intersections, not centimeters
On a grid, a route is a list of instructions like drive two intersections, turn right, drive one intersection. Every number in it is a count of intersections, so it means the same thing on any grid, whatever the spacing between the lines. And because every stop happens on an intersection the sensors found, the robot knows exactly where it is after each one.
You plan the route
You look at the grid, work out the drives and turns on paper, and write them into a test.
The robot plans the route
You name an intersection, like "go to (2, 3)", and the robot works out the drives and turns itself.
In Module 3, how does the robot know to drive two intersections and then turn right?
Your roadmap
| Lesson | What happens |
|---|---|
| 3-1 · Intro to the Grid | Put the robot on the grid and drive to the first intersection with the functions you already have. The GRID DRIVING section opens. |
| 3-2 · Multiple Intersections | Drive through a chosen number of intersections with one call: the section's first function. |
| 3-3 · Turning on the Grid | Turn corners: drive, turn, drive, tracing an L-shaped path you planned on paper. |
| 3-4 · Final Project | Drive a square, two intersections per side, and end where you started. |
Wrap-up
- What will the robot do by the end of the module? (Drive a square on the grid and finish where it started.)
- Why is there so little new driving code? (LINE SENSOR and LINE TRACKING already handle lines, crosses and turns, and a grid is made of those.)
- Who plans the route in Module 3? (You do. In Module 4, the robot will.)